Tips for cleaning tiles

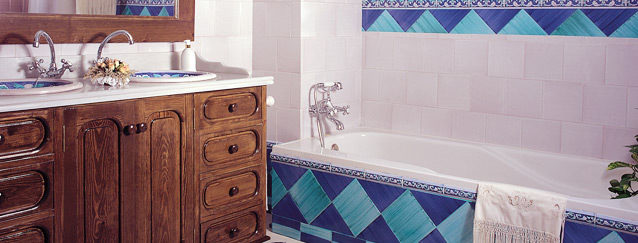
The tiles are the kings of the kitchens and bathrooms, and it is rare that the house does not have them in one of these rooms. Its insulating walls and protective function as well as the ability to clean, something we can not do on the paint, makes hits in these places.
Although cleaning is very simple, not always accompany the results. And the passage of time, coupled with factors such as daily fat accumulation often difficult to get them shiny again.
We will learn a few home remedies that will help us to make this task have a good ending. As normal substances have at home such as vinegar or ammonia they will provide us with the task of restoring brightness and total clean our tiles.
How to clean tiles
Water and vinegar: Pour water and a splash of vinegar (half cup) in a bowl. Stir and with the help of a piece of paper soaked in liquid paper, we cleaned the tiles.
We finish the task by passing a cloth dampened with water to remove any remaining vinegar and smell that could be.
Water and ammonia: Same as above, but substituting vinegar for ammonia. Their results are very similar, we can choose the version you like best.
Tips for drilling on tiles
Should be marked with a punch the site where drilling has tile on it and then cross two pieces of masking tape, so that the bit does not slip.

Make holes on the wall tiling is a task that, while not difficult, can have drawbacks if some minimal precautions are not taken. This article reviews tips drilling tiles and on the importance of using masking tape and drill bits TCT in this work. It also mentions the alternative of a specialized tool: Drill the fastener.
Precautions to drill on tiles
Drilling on tiles is a task without being too difficult, headaches can result if proper precautions are not taken. The main hurdle to face are the features tiled surface: very smooth, hard and brittle. This can make the cost make the hole in the right place, or worse, break the tile, in which case there will be no choice but to replace it. Below, a few tips are given to prevent this from happening.
The first step is to define where you have to make the hole. Joints should be avoided. The closer to the center of the tile , the better , because the central area is the greater resistance offered. If a hole in the coupling of two (or more ) tiles , it is likely that at least one crack is performed.
Another precaution to take, not least, has to do with making sure the wall has been no drilling pipes or other internal connections that may be damaged by drilling. To check, you can check the house plans or better yet , use a cable and pipe detector .
Once defined the exact site , should point it out first with a pen and then make a small mark on it with a punch and hammer. Should be very careful when making this sign (very small , barely lift the enamel) , as excessive force could also damage the entire tile. That point will be the guide for the drill tip will not move and the hole is in the desired location .
Masking tape and Bits TCT
The next step is to glue two pieces of tape crossed on tile, so that the intersection between the two pieces of tape is just above the gate mark bodybuilder . This material will provide stability and avoid any detours bit once it has begun the task of drilling.
Before you grab the drill , it is advisable to get a paper, folded to form an envelope or "pocket" and paste (you can use the same masking tape ) just below where the hole is to be performed . Thus, most of the dust detached from the wall will go there and further facilitate the work of cleaning .
And at the time of taking the drill, you have to take two precautions. The first is to use a bit of a tough material called TCT ( colloquial name that is known to tungsten carbide or tungsten , and derived from the German phrase " Wie Diamant " , ie , " as diamond " ) . And second , running the drill in normal mode and not in percussion , as use in the latter could cause the breaking of the tile.
As a recommendation, holes should not be performed on the tiled with a drill bit with a diameter greater than 6 millimeters. In the event that a larger hole is needed, one alternative is to drill with the drill bit first 6 mm and then enlarge the diameter with a greater bit.
Using drill bits fixer
There is a tool specifically designed to drill on tiles: the jig drills. Its use is not widespread, but very useful. It is a plastic piece whose shape reminds the barrel of a revolver, with circular holes of different diameters, to suit a variety of sizes of drill bits. At one end, the fastener has a gum which, when pressed against the tile produces a suction effect and attaches it to the wall.
Although the fixative used bits, you still need a punch mark the exact spot where it was drilling. But then no longer need to use the masking tape because the supplies fixing charges.
Advice to place tiles in the bathroom home
The most important thing to know about placing tiles is that the wall surface needs to be leveled and rough but uniform.

The premise to place tiles in the bathroom properly is, first , make all measurements the width and height of each wall less the part of the doors and windows ; is also recommended to add to the previous result one square meter more material to have a margin of error . Furthermore, it is necessary to adjust the cuffs that are defective tiles to adhere to the surface perfectly.
Steps to follow
As a first step the most important thing is to plug all the holes and cracks with cement and sand are much more resistant to humidity typical in places like the bathroom elements. As usually you have to cut some tiles to fit perfectly on the wall, what to do is always start with the most visible part of this space , so that the pieces that have been cut are placed in less visible parts place .
With respect to the height , and depending on where the furniture is located, will begin to place full tiles in the top or at the bottom as best suits , that is, if the furniture is in the bottom the tiles must be integers from above so that will cut into the bottom it will not be visible . When considering how to place tiles must consider the height at which van switches and sockets.
Additional recommendations
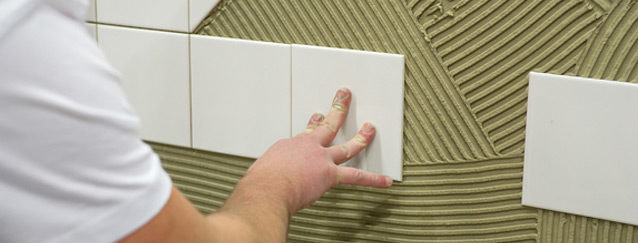
The cement recommended for this purpose since the plastic is to be distributed in each tile facilitates leveling and better adherence of the same . Then with the help of a wooden mallet they are placed each ceramic hitting until it fits snugly . Then a spirit level to make sure it has been properly leveled space where they have been placed .
Knowing how to place tiles also noted that they do not have enamel defects because it will remove harmony with the rest of the wall required. To cut the tiles a cutting machine that , despite being easy to handle , it is advisable to be used by people who already have practical use in management . The process of how to place tiles also requires making holes of water intakes , for which a very sharp tip is used steel and ceramics are glazed part hits .
Knowing how to place tiles also noted that they do not have enamel defects because it will remove harmony with the rest of the wall required. To cut the tiles a cutting machine that , despite being easy to handle , it is advisable to be used by people who already have practical use in management . The process of how to place tiles also requires making holes of water intakes , for which a very sharp tip is used steel and ceramics are glazed part hits .
